Betta Breeding Tank Set Up
December 8, 2020Breeding fish in your home aquariums can be very rewarding. In the Betta Life Fish room we breed a number of Pleco types, guppies and a couple different strains of Cichlid, with the largest portion of breeding dedicated to Betta fish.
In this post we are going to talk about the steps we use to breed Bettas. There are many different variations that people use to accomplish a successful breeding. I have gone through much trial and error in my journey to find what works. It’s a lot of work and can be very challenging in the beginning, but watching your little bettas grow and color up is so rewarding.
We will start from the beginning. Picking your pairs!!
Before you start breeding you will want to have an idea of what kind of bettas you want to breed. In this day in age there are so many tail types, sizes and color variations to choose from. When choosing a pair to breed you want to look for key indicators that your fish are ready.
For the male you want a male that is yonge, vibrant and confident. Bettas are territorial and they are a dominant fish, if your male isn’t healthy, yonge and confident your female won’t submit to him for breeding. Another thing to look for is a male that builds bubble nests in his tank. The ideal age to breed a amle betta is between 4-7months old. Many males as they get older simply lose interest in breeding and don’t really care to interact with a female partner put into a tank with him.
Choosing your female will be similar to choosing a male in that you want a female that is active vibrant and healthy for breeding. Just as a male has indicators that she is ready for breeding so does a female. A female that is ready to beed will show signs of swelling in the chest area, almost like she is carrying a small marble in her belly. Some females when kept in close proximity to males will develop a large sack of eggs. Watch for this because if the female develops too many eggs and is unable to absorb them, and if you don’t breed her she can get egg bound and die.
Before you are confident you have the right pair to breed, the last thing you want to be sure of is that the male and female are the same size or the male is slightly larger. This is important because if the female is too big the male won’t be able to wrap around her to push the eggs out.
Once I have chosen my pair for breeding l like to put them in tanks beside one another, and for the following week I will make sure they get plenty of proteins from bloodworms and brine shrimp so that they are strong enough to make it through the breeding process.
Tank Set Up…
The tank set up is crucial! You can have the perfect and healthiest fish for breeding but if your tank isn’t set up properly you risk losing your breeding pair and all your fry.
For the tank set up you will need:
- 5 Gallon tank and lid
- 50watt heater with adjustable temp
- sponge filter and pump (cycled)
- air stone
- plant, preferably an anubias on a log
- large almond leaf
- glass tube 3″-4″ around by 6″ high
- aquarium light
5 Gallon tank – it is important that you use a seperate tank set up for breeding. You never want to use the tank your fish already live in because one the fry are free swimming you will need to remove the male. I find a 5 gallon filled half way is the perfect step one tank for breeding, it has enough room for all the breeding components and for the pair to swim and interact.
Once you have fry, the fry can live happily and grow out in the for at least the first month or two depending on how many fry you have. Your breeding tank will also need a lid, you want to create a humidity layer between the warm water and the lid, this creates the ideal conditions for the bettas development, especially when they start to develop their lungs and swim to the water surface to get air. Without the humidity they would get cold air when they surface and that could cause issues with their development and they could die.
Heater– a heater is crucial to maintaining optimal water temp. Bettas are a tropical fish, they won’t breed if they are cold, and the fry won’t survive. Ideally you want to keep the water around 78-80. At that temperature I have had the most success.
Sponge filter, pump and air stone – For this portion of the set up I use a small air pump, my go too is the Aqueon 10, a two way air nozzle with flow valve, small sponge filter and an air stone. I do it this way because when I do my set up I don’t fill the tank all the way, so for the first few weeks the sponge filter is not totally submerged. I still need some oxygen going into the water so I have the air stone submerged but the flow turned down very low.
This portion of the set up can be tricky, the pump will be pushing air into the small sponge filter so you will get some bubbles flowing from the top of the tube above the water surface. You can keep the air flow that’s going into the sponge filter high because it won’t really disturb the water surface or the nest. The air stone on the other hand you need to be careful with. You want to create a small amount of bubbles through the stone, but make sure it isn’t causing too much surface disruption.
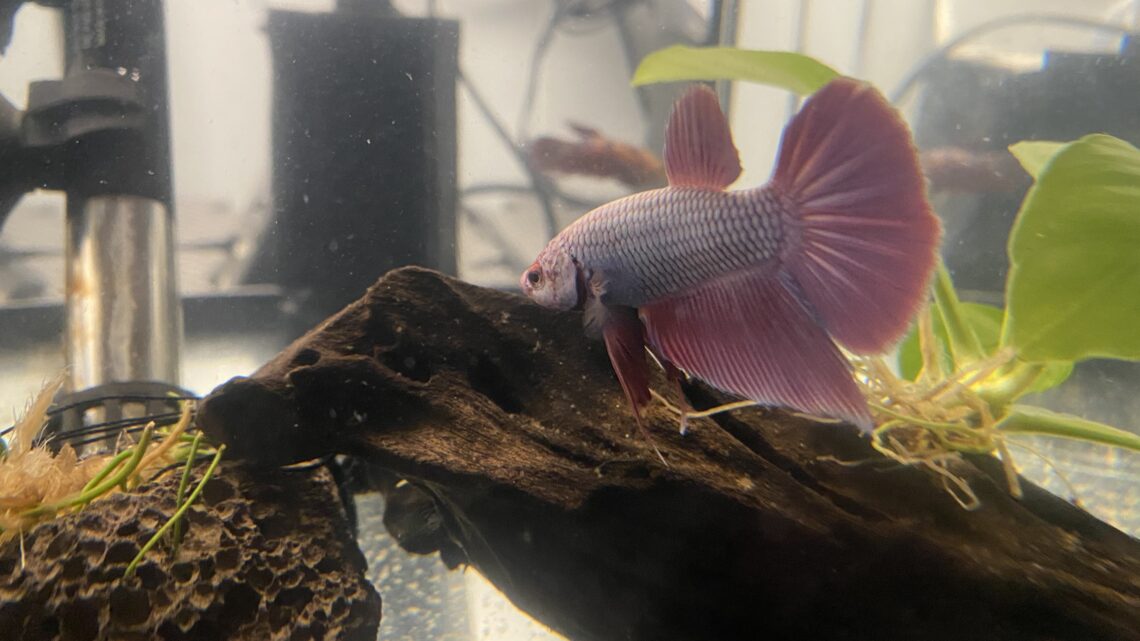
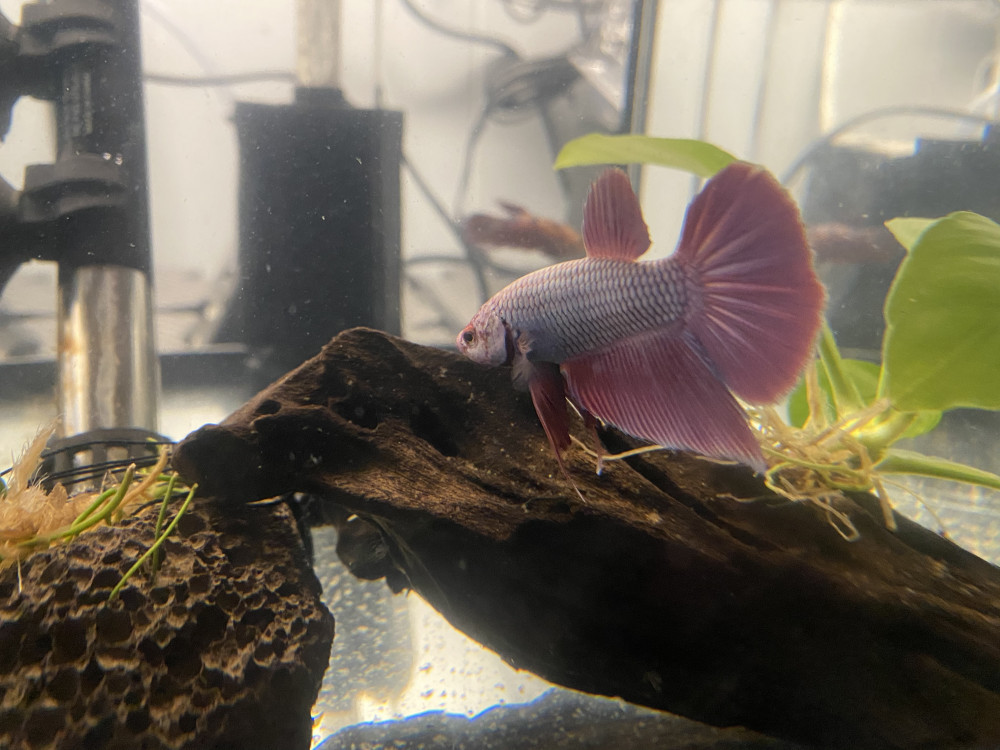
Plant – This is not something I see many other people talk about using in their set up, but I find it is a great addition to the tank. My go too is a small anubias on a log. I like this plant because it is a low light plant that doesn’t need to be planted making it easy to use again and again in my breeding tank set ups.
I use a plant on a log because it helps establish healthy bio in the tank, it gives the female a place to hide if the male is chasing her too much and it also offers a food source to the fry when they start to free swim until they get fed BBS.
Large almond leaf – many people use a piece of plastic, styrofoam, or many other flowing ites for the male bettas to make their nests with. I prefer to use almond leaves. The almond leaf is perfect for the males to attach their nests to, the leaf also releases tannins in the water which conditions the water perfectly for the fry, and as the leaf deteriorated microscopic water bugs and worms grow in the tank that is a natural food for the fry. They can be hard to find, I usually order mine from amazon or sometimes I can get them from a specialty fish store online like angelfins.
Glass Hurricane – out of all the things I have seen and used this is by far the best and easiest way to divide the male from the female for the first day or two while he makes a nest. It also is a great way to trap the female and eventually the male so you can scoop them out of the tank without causing any major disturbances in the water and to the fry. You want to get one 3-4″ in diameter and about 6″ high is the best.
Aquarium light – This you will only need once the bettas breed and the male has eggs to take care of. This light does not need to be strong, but just enough to allow the male to see the eggs drop out of the nest during the night so he can catch them and put them back. I like to rest a small light at the top of the tank just above the almond leaf.
Once you have all of your pieces you are ready to set up the tank..
You will start by adding conditioned water, filling the tank about half way. I like to add a little bit of aquarium salt to the tank at this time as it helps with controlling bacteria and softening the water for the breeding.
You then want to add the heater and the sponge filter with the air stone. When you add the sponge filter you want to make sure the water level is just high enough that the sponge itself is completely submerged. If it isnt add some more water. If you’re wondering why I don’t fill the tank, I have two reasons for this. The first is because I want the space between the water and the lid to create that humidity space. The second is because once the eggs are in the nest and up until the fry are free swimming the male betta is constantly swimming from the tank floor up to the nest to put the fry and or eggs back in the nest. If the tank was full that just adds extra work for him.
Next is the addition of the heater, you may find most adjustable heaters are too long to stand up in a half full tank, so I just put mine on an angle on the side of the tank. I then add my plant, a couple bio balls from a filter, and my plant.
I’ll leave the tank for a couple hours to let the heater warm up the water. I know the tank is ready when I start to see condensation build on the lid and glass above the water.
Adding your fish. You will want to add the male first. Let him swim around and explore the tank for about an hour before adding the female. You will notice him checking out all the different components in the tank. When I’m ready to add the female I’ll put the glass hurricane in first, then drop the female inside of it. I’ll leave her in the hurricane for a day or two while the male shows off to the female and builds his bubble nest.
When I have noticed that the male has started a bubble nest I release the female from the hurricane glass by slowly lifting it out of the tank. The female will usually go over to the nest and inspect it, and the pair will chase each other around the tank. During this time you want to keep an eye on them. Sometimes the male is the aggressor and other times the female is. During the breeding process the bettas sometimes tear each other’s fins and bite at each other. If you see major damage and one of the fish being over aggressive to the other you will want to pull them out. Major cuts and bites can cause infection and you could lose your betta if you don’t take good care of them after an encounter like this. During this time I alway like to put cardboard around the tank to give them complete privacy, I don’t want other fish or things to distract them or stop them from wanting to breed. I will keep the cardboard around the tank until the time I remove the male.
If the female accepts the male and they decide to breed you will notice them swinging together a lot around the nest. The female will tilt her body towards the bottom of the tank to signal to the male she will submit to him and the male will take the que and attempt to wrap himself around her. If successful they lock and pause while wrapped together. The male will loosen his grip and slowly release the female. As he does this you will see eggs falling from the female. The male will start to quickly collect them and then place them in the nest. You may see the female fall to the bottom of the tank or float at the top almost lifeless, this is normal, after a few mon you will see her start to move again and start to swim. Sometimes the female will help the male gather the eggs and put them in the nest. They will continue this process a few more times until they are done breeding.
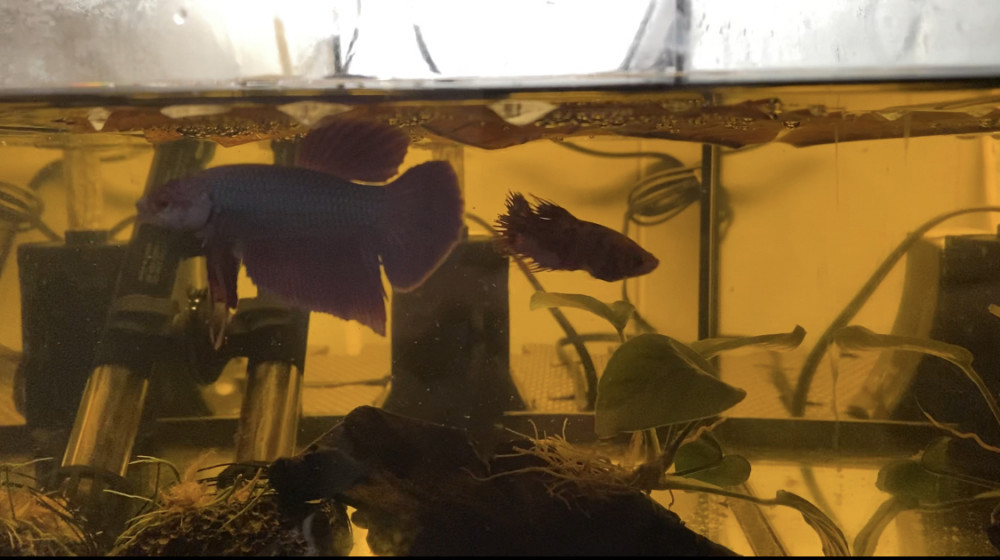
Some males will chase the female away from the nest almost immediately after they are done breeding, others will work together and collect eggs and blow bubbles to secure the eggs in the nest. When you notice the female staying away from the male and nest it is time to pull her out. The male bettas will become very protective over the nest and it can become very aggressive towards the female, it becomes dangerous for her to stay in the tank with him.
Use the hurricane glass to trap her when you see her on her own. Once she is in there you can use a small net to scoop her up without causing any surface disturbance. When you take her out you will want to make sure you are keeping her in fresh and clean water, ass some small almond leaves and a bit of aquarium salt to the water as well. She may need some time to heal from the process. Don’t forget to give her a good feeding. You don’t feed the fish while they are in the breeding tank so she will be very hungry.
The eggs hatch. A few days after the eggs have been in the nest they will start to hatch. The male will still be taking care of the eggs,moving them around and adding more bubbles, so make sure you leave the light on for him.
There have been many times I will have a nest full of eggs, and then the next morning the male has destroyed the nest overnight and eggs are everywhere. Sometimes they do this to sort out the fertilised eggs from the non fertilized ones. The male will eat any eggs that aren’t fertilized, and put the remaining eggs back into the nest.
When the fry hatch they spend the first couple days feeding off the egg sack. During this time some of the fry may develop quicker than others. the male with round up and fry that starts to swim away and bring them back to the nest. By day three there usually no fry left in the nest and they are all free swimming. At this point you can remove the male. Depending on how many fry hatched with may be a challenge. You will need to be very patient.
When the fry are free swimming you will need to feed them, you don’t want to do this with the male still in the tank as he is starving and you don’t want him accidentally eating some of the fry.
Using the hurricane glass again I will hover it over the water surface in a space I don’t see any fry. Use some caution here, I have had males for up to a couple days after the fry are free swimming and still collect the fry and try to keep them in the nest. It’s for this reason I always put a real plant in the tank, it will offer a food source for the fry while the male is still in the tank. Watch your male to make sure he isn’t still doing this when you go to remove him, or remove him once you see that he has spat the fry out.
When you take him out, you will want to give the male a good feeding and the same water set up as you did for the female in case he has some war wounds he needs to heal.
Feeding your fry. At this stage you have anywhere from 15-50 fry swimming around your tank. they would have eaten most is not all of the micro foods that developed from the plant and the almond leaf. At this stage you will be very happy you have an established sponge filter and log in the tank to offer bio support. Without it, you risk your tank getting sick while adjusting to the bio load and your fry would not survive this.
For the first couple weeks I feed my fry a mixture of frozen BBS and freshly hatched BBS. On the days I feed frozen BBS I will feed them in the morning and at night. If they are getting freshly hatched live BBS they will get a good feeding in the morning, and then I won’t feed again until the next day.
There are some great fry starter powders out there, and I do use them, but I don’t use them until the 3rd to 4th week. I find when the fry are very small they don’t really eat very much of the powders so it ends up clouding the water and affecting the water quality.
I will continue this feeding schedule until they are large enough for the addition of frozen blood worms and the eventually pellets.
Tank cleaning– This can be a challenge in a fry tank. Brings us back to why I always use a plant in the tank with a filtered sponge. This will make a major difference to how much you will need to clean the tank. You really can’t clean the tank for the first time until you get your fry past the first 10 days. The first 10 days are the hardest. You may lose a few of the fry at the time, it is natural. They are also very sensitive to everything, water temperature, water condition and adequate food source.
Another reason why you have to wait till you get the fry to the first 10 days before cleaning is because they are so small and fragile you don’t want to risk sucking them up or creating too much water disturbance.
After the first 10days I will use a turkey baster to suck up any sediment or dirt collected at the bottom of the tank.
Water changes at this stage are tricky. I like to have a bucket of conditioned water set up with a heater in it, almond leaf, and some aquarium salt. This way when I am adding water, I am adding water that is as close to the condition of what’s in the tank as possible so that I don’t affect the fry. When I add water I use a small plastic cup to slowly add the water so I don’t push the fry around too much. I do 1L – 2L water changes in the 5 gallon tanks two times a week, depending on how many fry are in the tank.
Regular water changes are important for two reasons. The first is to make sure the sediment on the bottom of the tank doesn’t affect the water conditions and make the fry sick. The second is because as some of the fry grow they release chemicals that stunt the growth of the other fry. If you are doing regular water changes you can help reduce the effects of this.
I find the fry are usually pretty good in the 5 gallon tank for the first few months. after that you will want to move them into a larger grow out tank. I use two sizes. Fro my regular sized betta fry I will move my fry into a 20 gallon long planted tank to continue the grow out process and recycle the 5 gallon tank for the next pair. For my betta giant fry I move them into a 54 gallon tank to grow out.
Everyone has different thoughts about when to separate your males and females. I personally find I don’t really need to seperate them. In my experience if the bettas are fed regularly and have lots of hiding places in the tank along with adequate swim space they really don’t fight. In fact they live together pretty harmoniously. It doesn’t always work out perfectly, but for the sake of space and fish care, I much rather have them all living happily in a large tank then separate them all into small containers or tanks like breeders overseas do.
And that’s about it… That’s the basics to breeding Betta fish. Like anything, everyone has a process they feel is best. I have known people who breed the bettas in buckets with a plastic sheet and have success. This process is the one I have used and had success with.
We would love to hear your story. If you have any experiences you want to share please do below. Would love to hear about what you do, and of course if you have any questions ask away 
Thank you for this. It was very informative. I was unsure what all I would need for my male and female beta and this helps a lot! Cant wait to start building my little homes for them
Thankyou for visiting our website. Our fish room is our passion and we love to share our experiences with our visitors. Please let me know how your set up goes and if you need any help along the way, makes me happy to hear that you got what you needed from this post … Good luck!!